Chromebook is a popular choice for students, professionals, and casual users alike. Why is it so? It is mainly because of its sleek design and seamless integration with Google services.
One of the features that often comes in handy is the ability to take screenshots. Many users have also mentioned it as Chromebook screenshot is a great tool to capture screenshots and record video clips.
So if you are capturing important details from a webpage, sharing funny memes with friends, or preserving snippets of online articles for later reference, knowing how to take a screenshot on a Chromebook can be incredibly useful.
At this point, you must be wondering how to screen capture Chromebook is essential. Let us tell you, you’ve landed in the right place. We are here with a quick guide that will introduce you to the simple techniques you need to master.
The Different Methods for Taking a Screenshot on a Chromebook
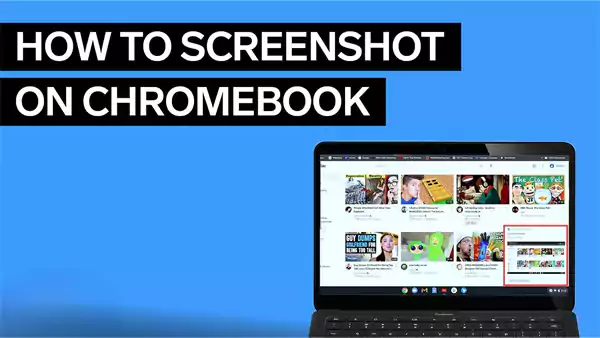
Taking a screenshot on Chromebook is as easy as you can think of. To do so, there are multiple methods available to suit your needs. All 4 of them are as follows:
Using the Keyboard Shortcut
The Chromebook keyboard shortcut works well on any model and taking a screenshot on Chromebook is incredibly easy with keyboard shortcuts.
As you can guess, this method is quick and efficient if you are in a hurry.
And the best part is, you can take a screenshot of the entire Chromebook screen as well as a snippet of a specific part of your Chromebook screen.
Want to know how? Here are the steps:
Screenshot Entire Screen
- Look at your keyboard and press the Ctrl + Show Windows keys together.
- The moment you do that a pop-up will appear on your screen in the bottom right corner. That’s all you have to do.
Screenshot a Specific Part of the Screen
- When you have to screenshot a specific region or part of the screen, press the Ctrl + Shift + Show Windows keys at the same time.
- Now the cursor will turn into a little target. Use it to click and drag the mouse to select a specific area.
- Release the mouse button once you are done with selecting the region. At this point, you will be presented with a request to capture what was selected.
- Finally, you will be notified with a pop-up stating the screenshot has been saved through the files app of your Chromebook.
Wondering where your screenshot has gone? Well, It gets automatically saved to the files app of your Chromebook. In addition, it will be labeled with the time and date of when it was captured.
Using a Chrome Extension
Do you want to explore more advanced options? Chrome extensions are a great solution. Chrome extensions provide additional features that go beyond basic screenshot capabilities.
One of the most popular choices is “Lightshot”. This extension is known to capture any part of your screen quickly. The best part is that you can edit the image right away after capturing it and share it instantly.
To use this extension, simply launch the “Google Chrome” and head to the Chrome Web Store, and search for what you need. Lastly, click “Add to Chrome”.
Using a Quick Settings
Many users face hard time using Chromebook screenshot shortcut keys. For those with remembering problems, Google added a shortcut button. Guess where? The answer is in the Quick Settings panel for the same.
This way, they don’t need to remember shortcuts anymore. Anyway, let’s see how to take a screenshot on Chromebook using the quick settings panel.
- On your Chromebook’s Shelf, click on the time.
- Now a Quick Settings menu has popped up.
- Then, click on the Screen Capture.
- Finally, the toolbar will launch.
How to Use a Screenshot Toolbar
The Screen Capture Toolbar comes with a variety of screenshot options. These options not only allow you to take screenshots but also let you capture screen recordings as well.
In addition, you can capture the entire screen, a specific section of the screen, or can take a window screenshot.
Now, let’s see how you can access the Screen Capture Toolbar:
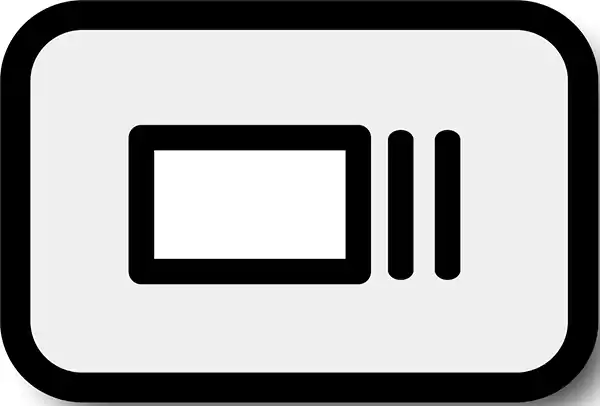
- Start by pressing Shift + Ctrl + Show Windows keys at the same time. Want to know where you find the Show Window key and how does it looks like? To answer, it is located at the top of your keyboard. Concerning its appearance, it includes a rectangle with two vertical lines on its right side.
- Now that you have entered the hotkey shortcut, you can see a toolbar that will appear at the bottom of the screen.
From here users can add sound to video recordings. How? Simply go to Settings and then toggle on the “Record microphone” option.
How to Access Saved Screenshot On Chromebook?
As stated earlier, the screenshots on Chromebook are automatically saved to the Download folder in the files app. This setting is by default. But if you want to change the settings, then it is possible with only a few clicks.
- To change the save location, press Shift + Ctrl + Show Windows keys at the same time keys at the same time.
- After that, head towards the settings and click on the “Select Folder” option.
- Choose the location where you want to save the images or videos captured.
In case you are not able to find your SS in the download folder, then you can access it from the clipboard. Clipboard typically allows users to copy and store up to 5 items. The place where all the SS are kept saved is known as Tote.
To view what is saved on your clipboard you have to press the Everything button (also known as the Search key) + V key.
Conclusion
To conclude this guide, knowing how to take a screenshot on Chromebook is important and can significantly improve productivity as well as communication.
By using the techniques mentioned in this guide, you can quickly get your job done, be it screenshots in the entire webpage, specific windows, or custom sections of the screen.
Remember, each method comes with unique benefits depending on your needs and workflow.
However, the versatility of the Chromebook’s screenshot feature makes it an ideal tool for professionals, students, and common beings willing to capture effectively.
Now that you are armed with all the knowledge needed to take a perfect screenshot on Chromebook, start using this feature today to share and save important details.
FAQs
How do I screenshot on a Chromebook?
Ans: To screenshot on Chromebook, use a keyboard and press Ctrl + Show Windows key to take a screenshot of the whole screen and press Ctrl + Shift + Windows key to screenshot a specific area of the screen.
How do I take a screenshot on a Chromebook without a Windows key?
Ans: If your Chromebook doesn’t have the function keys, then you just have to press the power button + volume down keys at the same time to take a screenshot.
How do you take a screenshot on a Chromebook with an Alt key?
Ans: To screenshot an active window press Ctrl, Alt, and Overview buttons at the same time. After that, select the window you wish to screenshot and hit Enter to capture the screenshot.
