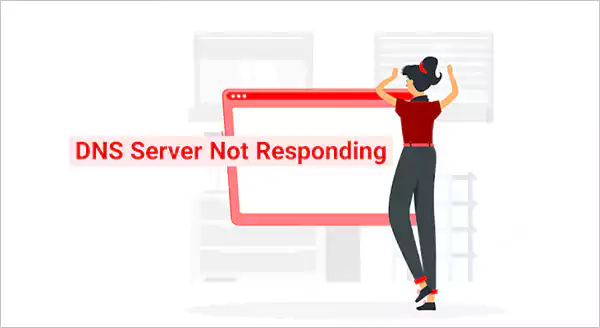
Picture this: you are all set to watch the movie you’ve been waiting for it to launch. The moment you click on the link, and suddenly—nothing happens. Instead, your screen is displaying an error message that says “DNS Server Not Responding”.
Does this sound familiar? or Have any of you ever been in such a situation? If that’s the case, we agree that this error can throw a wrench in anyone’s online plans.
The DNS server not responding is more common than you might think. There might be a few reasons why this is happening. We will discuss them shortly.
Before that, it is equally important to understand what does it mean the DNS server is not responding. However, we’ll be covering all of it.
No matter if you’re using Windows 10 or Windows 11 or generally facing issues with Wi-Fi connectivity, there’s a solution for everyone here in this guide.
What Does It Mean The DNS Server Is Not Responding?
To completely understand this error, you first need to know what DNS or domain name system. It is a protocol that maintains a database of domain names corresponding to specific IP addresses.
Simply put, this system acts as a translator that converts user-friendly domain names into IP addresses and makes them understandable by computers. When there is something wrong then only you can come across any potential errors.
The DNS server not responding error indicates that the DNS of the domain you are willing to access is unavailable. There could be many reasons behind it. If you want to know what they are, then continue reading to the next section.
Common Causes of the Error
As we said above, the DNS server is not responding in Windows 10 error can arise for many reasons which may range from minor glitches in the network connection to misconfigurations within the router. Let’s find them all:
- At first, there could be a problem with the hardware and software. How? Chances are the router is malfunctioning, incorrect network settings taking a toll, and outdated adaptor drivers, and Firewall software are causing the network issue.
- The second reason could be incorrect or missing DNS records. It typically occurs due to the failure of the browser to find the correct IP address in response to an outdated cache.
- The third reason behind the DNS server not responding could be a traffic overload or server outage.
- Fourthly, third-party security softwares like firewalls or antivirus programs can interfere with the DNS queries and lead to interruptions in service when they misinterpret normal traffic as threats.
That’s all for the cause. Thankfully, Fixing this error is quite easy. However, you can do it by yourself, without any help from an expert in the field.
10+ Ways to Fix the Error “DNS Server Not Responding”
If the DNS Server is not responding the way it supposed to be then you can fix it with a few workarounds. These workarounds have proven helpful. Or if one doesn’t work for you, then quickly jump onto the next one and see if the error is fixed or not. This way, one of the workarounds will probably fix the issue.
Hence, the workarounds that we are talking about are as follows:
Method 1: Restart Your Router and Computer
The simplest and most effective solution is to restart the router and computer. It works wonders by just refreshing the connection to the internet.
First, start with your router. Unplug from power, wait for about 30 seconds, and plug it back. This small reset can clear the temporary glitches that might be causing the connectivity problem.
Up next, it’s time for your computer to restart. Use a power button for the same. a reboot of the computer system clears memory and resets network settings.
Once both devices are powered back, and are in an ideal state, try accessing a website again.
This worked for you? That’s great! If not, proceed to the next workaround.
Method 2: Check and Troubleshoot Your Network Connection
DNS Server Not Responding Win 10 error is often caused by connectivity issues. Try to switch between networks. For example, you can use your mobile data or use your friend’s data. If after switching, you can access the web page then surely the problem is with your Wi-Fi connection.
Now wondering how to get rid of this network connection problem. The answer to your question is running the network diagnostic on your computer systems. Here are the steps to perform on Windows and macOS:
On Windows:
Before diving into the steps, first, make sure that you are connected to the troubled network. Then:
- From the control panel, click on the “Network and Internet” option.
- When you are presented with the list of options, click on “Network and Sharing Center”.
- Locate “Troubleshoot Problems” under the “Change your Networking Settings” option.
- Move your cursor toward “Additional Troubleshooters”.
- Select the option “Internet Connections” and click on “Run the Troubleshooter”.
- Wait until the troubleshooting process is complete, and you are done.
On macOS:
- When operating macOS, hold the “Option” key.
- Up next, click on the “Wi-Fi Status” icon from the menu bar.
- Now, choose the option “Open Wireless Diagnostics”.
- You will be promoted with a few instructions to examine the network connection. Just Follow them.
- Once the scanning is completed, click on the “Info” icon available in the “Summary” window. At this point, you can learn about the detected issue and suggested solutions for the same.
Method 3: Flush DNS Cache
Flushing the DNS cache can resolve a variety of connectivity issues. However, this process clears outdated or corrupted data that has been stored on your device for so long and enables fresh data to be retrieved from servers:
On Windows:
If you are using a Window then follow these steps to clear the DNS cache:
- Press the Windows and R keys simultaneously and access the Command Prompt.
- In an “Open” box, type in “cmd”.
- Click “OK”.
- Now, the Command Prompt window will appear on the screen.
- Before pressing “Enter”, type in “ipconfig/flushdns”.
- Finally, you’ll receive a confirmation message stating the DNS cache has been cleared.
On macOS:
- Start by pressing F4 and typing “Terminal” in the Launchpad search box. Alternatively, you can use Spotlight Search to launch the “Terminal” app.
- Type in the command based on the macOS you are running. Here are the commands you have to type based on your device’s OS:
| macOS Version | Command |
| X Yosemite | sudo discoveryutil udnsflushcaches |
| Catalina, High Sierra, Mojave, Sierra, X El Capitan, X Lion, X Mavericks, X Mountain Lion | sudo killall -HUP mDNSResponder |
| X Snow Leopard | sudo dscacheutil -flushcache |
| Big Sur | sudo dscacheutil -flushcache; sudo killall -HUP mDNSResponde |
| X Leopard and below | sudo lookupd -flushcache |
On Android:
- Launch Google Chrome on your device and type “chrome://net-internals/#dns” in the search box.
- Now, select DNS and tap on “Clear Host Cache”. That’s all.
On iOS: On an iPhone or on an iOS device, turn on the “Airplane Mode” and again turn it off.
Method 4: Change DNS Servers Address
Changing your DNS server address can often resolve the irritating “DNS Server Not Responding” error. By default, your device uses the DNS server chosen by your ISP. And, if that is having a temporary outage, then you want me able to use that DNS server.
Temporarily, you can solve this problem by switching to the public DNS server addresses like:
- 8.8.8.8 and 8.8.4.4 (Google)
- 208.67.222.222 and 208.67.220.220 (OpenDNS)
- 1.1.1.1 and 1.0.0.1 (Cloudflare)
Besides a temporary solution, here is what else you can do:
On Mac:
- Get your hands on your Mac device and navigate to “System Preferences”, then “Network”, and select the primary internet connection.
- Now click “Details” and tap on “DNS”.
- Once you are presented with the DNS servers list, scroll down a bit and click on the “+” button.
- On the appropriate field, enter your new DNS address.
- Click “Apply”.
On Windows:
- On your Windows OS, launch the “Control Panel”.
- Choose “Network Connections” and then tap on “Properties”.
- It is time to enter the IP address of your DNS server under the “Preferred DNS server”.
- Up next, input the address of your backup server under “Alternate DNS Server” and finally save the changes.
On iOS Mobile:
- On your iOS mobile, navigate to the Wi-Fi settings and find the DNS settings.
- Now, tap on the “i” icon and then Configure DNS.
- To further update the DNS, select “Manual” and then “< Add server”.
On Android Mobile:
- Using your Android device, launch “Settings”.
- Find the “Connections” options and click on “More connection settings”.
- Next, tap on “Private DNS” and then on “Private DNS provider hostname” to change the DNS server.
- The moment you are done with tweaking the settings, restart your device and try accessing the internet.
Method 5: Update the Computer’s Network Adapter Drivers (Windows/macOS)
Whenever you encounter a DNS not responding error, the next workaround to fix it is updating the computer’s network adapter drivers.
For those who don’t know, network adapter drivers are simple programs. These are responsible for connecting the PC to other devices like printers, routers, and Ethernet cables.
In case, the driver is outdated or corrupted, then it won’t be able to communicate with the adapter properly, and this may lead to connectivity issues.
However, to get rid of this issue, you are supposed to update it on your Windows or macOS:
On Windows:
- First, make use of “Windows Search” and access “Device Manager”.
- Find the adapter you want to update and right-click on it.
- Go to the “Driver” tab and click on the “Update Driver” option.
- To open the drop-down menu, scroll down to find “Network Adapters”.
When you are not sure which one is the correct driver then go ahead and update each and every network adaptor from the list.
On macOS:
- Locate the Wi-Fi AirPort icon on the desktop.
- To display a drop-down list, click on it.
- From the list, click on “Turn Wi-Fi off”.
- Wait for a minute.
- Repeat the first step again but remember, this time you have to click on “Turn Wi-Fi on”.
- Finally, reconnect to your network and test the network again.
Method 6: Temporarily Disable Antivirus, Firewall, or VPN
Sometimes, what happens is that the security software can interfere with the internet connection. This is especially true for antivirus programs, firewalls, and VPNs. Although they are designed to protect, they may mistakenly block DNS queries.
However, temporarily disabling these tools might resolve the “DNS Server Not Responding” issue. Keep in mind, do not leave them deactivated permanently.
Anyway, here are the steps you can rely on for the same:
- Launch the “Start” menu and click on the “Settings” option.
- Now, select “Updates and Security”.
- Up next, click on “Windows security” and then on “Virus and threat protection”.
- One by one open each antivirus, and firewall app you have installed and start deactivating them.
- Concerning a VPN app, you have to launch “Settings”.
- Click on “Network and internet”.
- From the left-hand side, click on “VPN”.
- Find the VPN you are currently using and click on it.
- Finally, click “Disconnect”.
Method 7: Disable Peer-To-Peer Feature (Windows)
The one more potential fix you can try is disabling the peer-to-peer feature. Want to know why one should do that? Well, it helps in reducing the amount of bandwidth when someone downloads updates.
Let’s illustrate with an example:
Suppose you found a pending update in your system. So, when you put it to update then rather than forcing the device to swallow all the data in one go, disabling the peer-to-peer feature splits updates into individual pieces.
The fact that it is a useful feature, but it can also interfere with the DNS lookup process. However, switching it off is ideal and can help you diagnose errors. That said, here are the steps to disable this feature:
- Go straight to the “Settings” and then click on “Windows Update”.
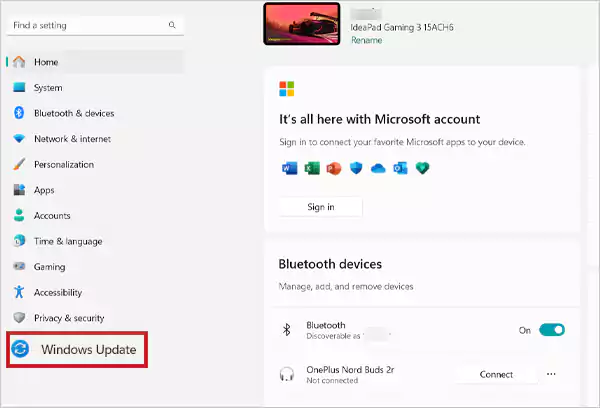
- Then, click on “Advanced Options”.
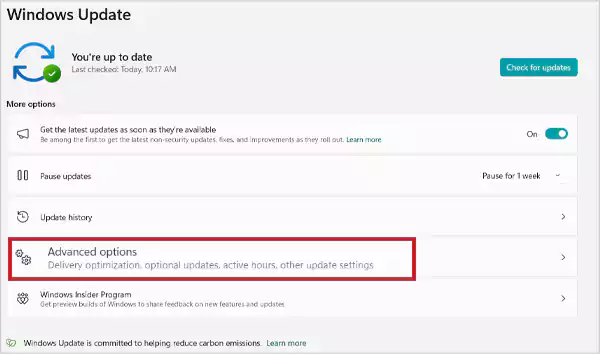
- Click on “Delivery Optimization”.

- On the top, you can find a switch labeled “Allow downloads from other PCs”. Toggle it on.

- To complete this process, restart your computer to test if the DNS server not responding error has been cleared or not.
Method 8: Use a Different Device or Web Browser
Sometimes, the simplest solutions are the most effective. However, if you are struggling with the DNS server not responding on Windows 10, then try switching devices or browsers.
Do you have another PC, tablet, or a smartphone? Then, give it a shot! This is suggested because sometimes primary devices might experience a temporary setback while others connect effortlessly.
In the same way, consider using a different web browser. For instance, if you rely on Google Chrome, then switch to Firefox or Edge and see if that resolves the problem.
Doing this will pinpoint if it’s an issue with the original setup or something more widespread affecting the network connection.
Method 9: Disable IPv6 on Computer
Do you know that every device uses a version of the IP to communicate with websites? Yes, you heard it right! And, the latest version is IPv6.
The fact that this version has not been fully adopted across devices and websites yet. Want to know why? Because it can cause errors like “DNS Server Not Responding”.
So, if your version has it then disabling it would be ideal. To do that, follow these steps:
On Windows:
- Start by right-clicking the network icon and selecting “Open network and internet settings”.
- Now hit on the “Network and sharing center” option.
- From the left sidebar click on “Change adapter settings”.
- On your active Wi-Fi connection, right-click and click on “Properties”.
- Navigate to the “Networking” tab and untick the box next to “Internet Protocol Version 6 (TCP/IPv6)”.
- Up next, save the changes by clicking “OK”.
- Finally, restart your computer.
To disable it on macOS, follow these steps:
- Open the “System Settings” and click on “Network”.
- Hit on the active network connection and then select “Details”.
- Then, click on the “TCP/IP” section.
- Open the drop-down menu labeled “Configure IPv6”.
- Up next, click on “Link-local only” and then on “OK”. Hence, this completes the process, and it’s your call to restart the Mac again.
Method 10: Restart PC in Safe Mode
When troubleshooting the DNS server not responding to Windows 10 error, restarting your PC in Safe Mode can have a significant impact. This special startup option only loads required drivers or services and minimizes potential conflicts.
To access Safe Mode on Windows, follow these steps:
- First, open the “Start” menu.
- Click on the “Power” button.
- Next, hold the “Shift” key while clicking “Restart”.
- A window will appear on your screen stating “Choose an option”. Choose “Troubleshoot” and then click on “Advanced options”.
- From the advanced options menu, select “Startup Settings” and click on “Restart”.
- Once your computer gets restarted, you will be presented with a list of options.
- Now, to access “Safe mode with networking” press the “F5” key.
- It’s time to try accessing the site you were previously trying to access again.
Do you own a macOS? If so, then you can rely on these steps:
- Start by opening the Apple menu and clicking on “Shut down”.
- Wait for at least 10 seconds and then turn your macOS back while pressing and holding the “Shift” key.
- Now a login screen will reappear on your screen, and you’ll be in safe mode.
Method 11: Disable Unused Connections
The last way to fix the problem of DNS not responding is to disable connections you don’t use. It includes a virtual network like a VPN or an Ethernet connection.
Anyway, here are the steps to disconnect the additional network connections on different types of devices:
On Windows:
- On Windows, you first have to go to the “Control Panel” and then click on “Network and Internet”.
- Then click on the “Network and Sharing Center” option.
- On the directed page, look at the left column and click on “Change adapter settings”.
- Doing this will direct you to the “Network Connections” page.
- Now, right-click every secondary connection one by one and select “Disable” to complete the process.
On macOS:
- Start by opening the “Apple” menu.
- Click on “System Settings” and then on “Network”.
- Then, select the network you wish to disable.
- To move ahead, toggle off the button to disconnect the networks as per your preferences.
- Now that you’ve disabled all the unused connections, reload the web page, and you are done.
How Do You Know the “DNS Server Not Responding” Error?
Identifying the “DNS Server Not Responding” error can be as easy as one can think of. In this section, we’ve talked about the situation when you may encounter this error. Here we go…
- You’ll typically notice it when trying to access a website or an online service. The error will state “DNS server isn’t responding” or “The site can’t be reached”.
- Another sign to know about this error could be when you encounter browser-related issues. That said, you need to remember one thing i.e. if multiple browsers show similar problems, it’s likely not just a software glitch.
- Next, if other devices connected with the same network experience connectivity issues. This indicates a broader problem with your DNS settings or router.
To Wrap Up
Being presented with the DNS Server Not Responding error can be frustrating but there is nothing to worry about as it is a common error. Understanding what this error means is key to resolving it effectively.
And, now that you know what it is how to resolve this error in 10+ ways. Remember that connectivity issues can stem from various sources, be it a temporary glitch in your network or outdated drivers.
Being proactive in fixing problems helps fix current problems and prevent future problems.

